How to install Webmin
When you have a newly installed Linux server, you can config the server line by line through the terminal, but sometimes there is a relief that you can have a GUI to config some settings, thanks to Webmin you can have a browser interface to interact with the server. here is how to install Webmin on Ubuntu server.
Add Webmin Ubuntu repository
Open the /etc/apt/sources.list file to manually add the repository link to the list. In order to open the sources.list file, run the following command as root in your Terminal:
$ sudo nano /etc/apt/sources.list
Add the following line in order to add the Webmin repository to the list:
deb http://download.webmin.com/download/repository sarge contrib
The next step is to get the Webmin PGP key for the newly added repository. This way the system will trust this repository. Run the following command to do so:
$ wget http://www.webmin.com/jcameron-key.asc
Then add the key through the following command:
$ sudo apt-key add jcameron-key.asc
Installing Webmin
$ sudo apt update
$ sudo apt install webmin -y
Configure Webmin
Stop Webmin from using TLS/SSL
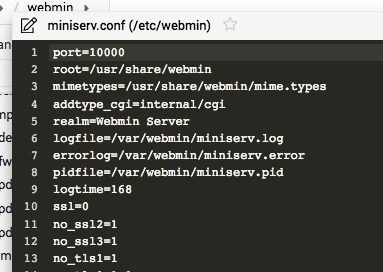
The next step is to tell Webmin to stop using TLS/SSL as we will later configure Apache for this purpose. Run the following command in order to access the miniserv.conf file:
$ sudo nano /etc/webmin/miniserv.conf
change ssl=1 to ssl=0 at line 10

Restart Webmin
$ sudo systemctl restart webmin

Then you can use your user to login to webmin web interface. http://your-server-ip:10000


